 The basic red circle for all the examples shown below was created using the Elliptical Marquee tool (Mac & Window = M) and filled with red with the paint bucket tool (Mac & Windows = G). I chose the color red because it is one of the most difficult colors to show shading and therefore reveals how well the different methods shade an object.

Using the Inner Shadow & Inner Glow effects in the layer menu. This method applies the effect automatically to the entire layer and the light spot is always centered. I don't think it is a good method for shading art but it is an easy method for shading some product mock-ups such as pillows and oven mitts.
Do the following steps to use the Inner Shadow & Inner Glow effects:
1. Select the layer that you wish to shade and use the Inner Shadow effect in the Layer Style command. Do this by selecting the "fx" button at the bottom of the Layers palette and choose the Inner Shadow effect from the pull down menu. I used the following settings for the example. Structure: blend = multiply; select dark red color by double clicking on black box; opacity = 94%; angle = 120; distance 53 px; choke = 0; size = 237 px; quality = default settings.
2. Use the Inner Glow effect in the Layer Style command. Select the "fx" button at the bottom of the Layers palette and choose the Inner Glow effect from the pull down menu. I used the following settings for the example.
Structure: blend = screen; opacity = 36%; noise = 15%; select light red color by double clicking on black box; elements source = center; choke = 46%; size = 250 px; quality = default settings.
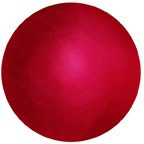
Using the Dodge (lighten) and Burn (darken) tools. By using this method you can lighten or darken any portion of the art on each layer. These tools are used by many Photoshop artists to shade their digitally created art. What I do not like about these tools are the colors used in doing the shading. Instead of using a lighter or darker hue of the color to be shaded, the Dodge tool uses white to lighten the color and the Burn tool uses black. It may look fine for some colors but I don't like the effect for darker colors like red.
Do the following to use the Dodge and Burn tools. Choose the Dodge or Burn tool from the tool bar or press the letter O on the keyboard. Rotate through the tools in that section (Dodge, Burn, Sponge) by holding down the shift key and clicking on the letter O key. Select the brush style, range (shadows, midtones, highlights), and exposure options that is located on the option bar (Mac = across the top of the window). Then shade the art or mock-up with the selected tool.

Using the Lighting Effects in the Render filter. This method applies the effect automatically to the entire layer. I find this a difficult method to use because the shading effects that you see in the Lighting Effects window are not the same once you leave the window. Therefore, I rarely use this method for shading.
Do the following to use the Lightening Effects in the Render filter. Go to the Filter command. Then select Render and then Lighting Effects in the pull down menus. In the Lighting Effects window, select omni for the light type and adjust the handles on the light source to get the effect you want. Adjust the setting to get the effect you wish. I used the following settings: intensity = 0; gross = -17; materual = 58; exposure = -31; ambience = 23 for the example at the left.
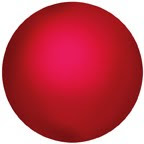
Using Mystical Lighting (plug-in filter software) from Auto FX (purchase price = $179). This plug-in allows you to apply 16 visual lighting and shading effects to your art and mock-ups. Applying the effects to any area on the layer is easy. However, I recommend watching the tutorials because the software is not very intuitive. A drawback to the software is that it is slow in rendering the effect in the Mystical Lighting window and returning to the Photoshop window. Even so, I still use this method of shading art and mock-ups because the gradiations of colors produce realistic shading.
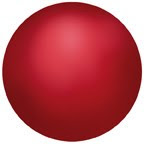
Using the Brush tool (Mac & Windows = B) by manually shading shapes. Not surprisingly this method makes the shape appear the most round of all the Photoshop methods. But it takes the most time because you need to constantly change the color hue to achieve the correct shading of the shape. I think this works well if you are painting your art digitally but is too much trouble if you want to give depth to product mock-ups that have many colors. In the example at the left, I used a progressively lighter red hue with a lesser amount of opacity as I used the Brush tool to paint toward the light spot on the object.


No comments:
Post a Comment