There are times that art needs some shading to give it dimension and make it "pop." Rather than use the paintbrush tool to apply color to lighten and darken areas in the art that you need to manually blend in with the other colors you can use Photoshop's dodge and burn tools that automatically blends the colors for you. The dodge tool uses white to lighten colors and the burn tool uses black to darken colors. However, I do not think the blending of the colors look very natural by using white and black (especially on dark colors) so instead I often use other Photoshop methods. Read "Photoshop Tip - Using Photoshop to Shade Art and Mockups" for various shading methods.
I recently discovered (thanks to an internet tutorial) that Photoshop also allows you to automatically shade art with any color of your choice by using the color dodge and color burn mode. Notice that I used the word mode in referring to color dodge and color burn. They are not considered tools or located in Photoshop's tool menu.
To clarify the above discussion, Photoshop has TWO dodge and burn methods of shading artwork. The one method that many artists know about is the dodge and burn tools located on the tool bar and the other one that artists may not know about is the color dodge and color burn mode located on the brush option bar. This tutorial illustrates how I used the color dodge and color burn MODE to make my morning glory art "pop."

Original Art
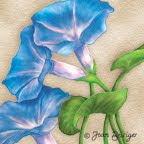
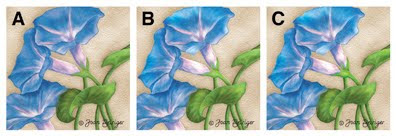
The original art shown in picture A is okay but it obviously is lacking depth. Highlighting areas on the flowers and leaves will give it the much needed dimension to make the art "pop."
Using the Color Dodge Mode to Lighten Art
Picture B shows areas on the petals and leaves highlighted. I used the color dodge mode in Photoshop to lighten areas in the art and what an improvement it made in comparison to the original art shown in picture A. The color dodge mode is located in the options bar when the brush tool is selected. The options bar is at the top of the screen under the menu bar. The following steps show how to use it to lighten art.
1. Select the brush tool (Mac & Windows = B).
2. Go to the Mode pull down menu in the options bar and select Color Dodge located in the middle of the menu.
3. Duplicate the art layer (pull down menu in the layers window - at the top). You will want to be able to switch back and forth between the edited version of your art and original art. Also it is easy to over do the shading and you will want to make sure that you can start over again if needed.
4. Lock the layer at the top of the layer menu so that you will not paint outside the edges of the art. Of course, if the entire layer is filled with art you do not need to do this. Note: When using the "dodge tool," the tool does not allow you to paint outside the art so you do not need to lock the layer.
5. Select a brush tip from the brushes menu. I used a spray brush tip to highlight the morning glory art but any brush will work.
6. Reduce the opacity to 10 percent or less.
7. Select a color lighter than the art you wish to highlight. It is located in the color window (foreground) at the bottom of the tool bar.
8. Start highlighting your art while adjusting the size of the brush (increase size = ] key; decrease size = [ key), opacity, and switch to different brush colors as you highlight different colors until you get the desired look. Periodically switch back and forth between your original art layer and your edited art layer to make sure that you have not highlighted the art too much and washed out the colors.
Using the Color Burn Mode to Darken Art
Picture C shows the edited art after the color dodge and color burn mode was applied to selected areas. It does not look much different than picture B because I did not have to darken many areas in this painting. They were already dark enough.
Essentially follow the steps outlined for the color dodge mode (steps 1 through 8) to edit your art but select the color burn mode instead of the color dodge mode. The color for the brush needs to be darker than the art instead of lighter and most likely you will need to use a very low opacity (5 percent or less) when using the color burn mode.
Note: Make sure that you switch the mode back to the normal mode after you use the color dodge and color burn modes. Otherwise, the brush tool will not work properly the next time you use it for painting.


Excellent information Joan! Thanks so much for sharing.
ReplyDeleteAwesome Joan! I am familiar with the tool bar dodge and burn but am off to try the color dodge and burn. THANK YOU!
ReplyDeleteTara Reed
www.ArtLicensingInfo.com
I love Photoshop suggestions. Thanks, I will try this next sometime!
ReplyDelete