


 Unfortunately, in Photoshop you cannot automatically place a border of art around the outer edge of a circle. This tutorial demonstrates a method that takes a little work but is still fairly simple to do once you know how.
Creating a Circle
1. Create a new layer in the layers pallet (F7) by selecting the make new layer icon at the bottom of the layers window.
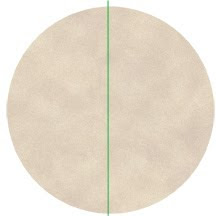
2. Create a circle by using the elliptical marquee tool on the tool bar (Apple and Windows = M). Hold down the shift key while you drag the tool to make it completely circular.
3. Fill the circle with a color by using the bucket tool (Apple & Windows = G) or place a background pattern on the circle and delete the excess as I did in this example.
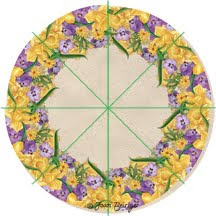
Creating Template Lines as Guides for the Placement of Art. In this example, I used four lines to divide the circle into eight spaces.
4. Create a new layer.
5. Select a foreground color on the tools pallet that is different than the circle color.
6. Select a brush (Mac & Windows = B) with a fairly fine tip (about 5) place the cursor at the center top of the window. Click once with the mouse. Place the cursor at the center bottom of the window, hold down the shift key and click the mouse. You now should have a line on top of the circle.
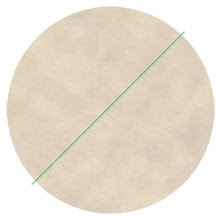
7. Use the transform tool (Mac - command + T; Windows = Ctrl + T) to select the line. By holding down the shift key and moving the cursor outside the bounding box you can rotate the line in 15 degree increments around the circle which equals 24 spaces. For this example, I want to rotate the line every 45 degrees (four lines) so I need to move the line three times.
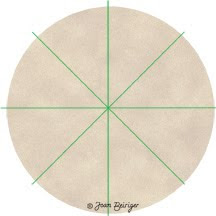
8. Reset the line to the original line orientation by selecting undo in the edit menu. The reason to undo the last step is so that you can use keystrokes to automatically duplicate the lines every 45 degrees. Hold down (Mac = command + option + shift; Windows = Ctrl + alt + shift) and press the letter T to duplicate the line at 45 degrees. Continually holding down the keys and push the letter T to duplicate the next line and again press T to duplicate the last line. You should have four template lines in separate layers that divide the circle into eight spaces.
Note: You are not limited to dividing the circle into eight spaces. You can use the technique above to divide the circle into as many spaces you wish as long as they are in 15 degree increments.
Placing art around the circle
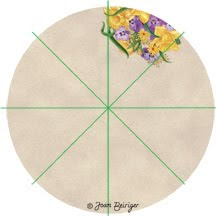
9. Open a new layer and fit the art into one area of the circle. In this case, I took my daffodil and violet art (BOU001) and resized and cut it to fit the outer curve of the circle. Notice that I placed some of the art over the template lines. I did this so that the border of art will look continuous once the art is duplicated around the circle.
10. Use the transform command to select the art.
11. Move the center mark in the bounding box (circle with lines) to the center of the circle (where the template lines intersect). By doing this, you will be able to more or less center the art around the circle when you duplicate it in the next step.
12. Duplicate the art in 45 degree increments as you did for the template lines in steps 7 and 8. You need to press the letter T six times to duplicate the art around the edge of the circle not three times like you did for the template lines. One edge of each top layer over laps the bottom layer to give it a continuos border of art.
13. Most likely the art is not correctly positioned along the edge of the circle so you will have to move the duplicated pieces into place.
14. Because the last art piece is the top layer, the right edge of the art is not tucked under the art of the first layer to make it look continuous. To correct it, duplicate the layer and move it below the first art layer.
15. Go to the top layer and erase the art that overlaps the art on the first layer. You now have a continuous border of art around the circle.
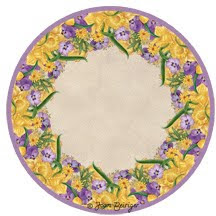
16. Remove the template lines and add a colored border if you wish.
Round formated art like this can be used as a plate, coaster, hot plate, or clock.
This was really helpful!!!
ReplyDelete