


 Gift bag mock-ups are a little more complicated to do than the mock-ups I showed in my Photoshop Tip - Using the Transform Command for Product Mock-ups tutorial. In this tutorial, I use a bunch of Photoshop commands and tools to create realistic gift bags. Look up the tool or command names in Photoshop help menu if you aren't familiar with them or don't know where they are located.
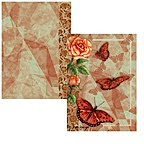
1. In the first layer, place a vertical art image (art example are butterflies and roses art) to the right of the window that will be used as the front panel of the bag.
2. In a second layer below the front panel layer, place vertical art to be used for the bag side panel (art example is a mottled pattern). I show a full size panel in the example but it only needs to be half that width.
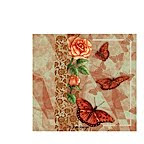
3. Use the marquee tool (located on the tool bar) and delete approximately half the side panel art or only create a narrow panel in the first place. Move the side panel art next to front panel and select both layers (front and side panels) in the Layers window. Use the align vertical center command that is located on the option bar ( Mac = across the top of the window) to align both layers.
4. Use the free transform tool on the panel layer (Mac = command + T; Windows - Cntl + T) , hold down the command key (Windows = Cntl key) and move the center left handle on the bounding box up and to the right to shear the panel. Use the hue/saturation command (Mac = command + U; Windows= Ctrl +U) and move the Lightness slider bar to the left (approximately to a minus 25) to darken the side panel and give the bag more dimension.
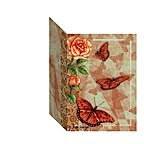
5. Open a new layer and use the polygonal lasso tool (located in the tool bar) to create the inside of the bag. By using this tool you are essentially creating a skewed box. Select the colors you wish in the foreground and background color window on the tool bar. Then use the gradient tool to fill the skewed box with a gradation of color.
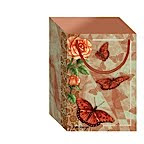
6. In a separate layer, draw a handle for the bag with the brush tool. If you wish, you can make the handle look more rounded by using the Layer Style command / Inner Glow effect. Select the "fx" button at the bottom of the Layers palette and choose the inner glow effect from the pull down menu. In my example, I used the following settings to make the handle look rounded. Structure: blend=screen; opacity = 55; noise = 0; color = cream. Elements: Technique = softer; source = center; choke = 0; size = 43. Quality was left with the default settings.
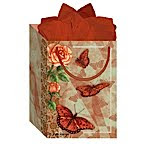
7. For a little bit of pizazz to the mock-up you can add tissue paper to the bag. I created the tissue paper by taking a picture of a gift bag with tissue paper in it. In Photoshop, I then deleted everything in the picture except the tissue paper and place the tissue paper layer between the front panel layer and the inside bag layer. Note: It doesn't matter what colored tissue paper you take a picture of because the color can be easily altered in Photoshop.
Copyright © 2009 Joan Beiriger
Hi, I've visited your blog and enjoy it. Good your blog. Success for you.
ReplyDeleteoh wow!!! this is very neat...thanks for sharing this with us!!!
ReplyDelete