Joan Website | Joan Bio | Joan Licensing Info | Joan Contact Info | Blog Main Page

Art Licensing by artist Joan Beiriger: I'm happy to share art licensing info but please
give me credit and link to my blog when using it on your site. Thanks.

Monday, November 30, 2009

Photoshop Tip - Using Color Dodge and Color Burn Mode to Touchup Art

There are times that art needs some shading to give it dimension and make it "pop." Rather than use the paintbrush tool to apply color to lighten and darken areas in the art that you need to manually blend in with the other colors you can use Photoshop's dodge and burn tools that automatically blends the colors for you. The dodge tool uses white to lighten colors and the burn tool uses black to darken colors. However, I do not think the blending of the colors look very natural by using white and black (especially on dark colors) so instead I often use other Photoshop methods. Read "Photoshop Tip - Using Photoshop to Shade Art and Mockups" for various shading methods.

I recently discovered (thanks to an internet tutorial) that Photoshop also allows you to automatically shade art with any color of your choice by using the color dodge and color burn mode. Notice that I used the word mode in referring to color dodge and color burn. They are not considered tools or located in Photoshop's tool menu.

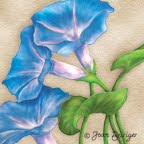
To clarify the above discussion, Photoshop has TWO dodge and burn methods of shading artwork. The one method that many artists know about is the dodge and burn tools located on the tool bar and the other one that artists may not know about is the color dodge and color burn mode located on the brush option bar. This tutorial illustrates how I used the color dodge and color burn MODE to make my morning glory art "pop."
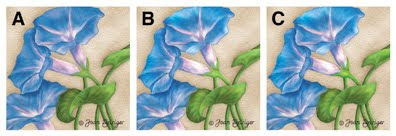


Original Art
The original art shown in picture A is okay but it obviously is lacking depth. Highlighting areas on the flowers and leaves will give it the much needed dimension to make the art "pop."

Using the Color Dodge Mode to Lighten Art
Picture B shows areas on the petals and leaves highlighted. I used the color dodge mode in Photoshop to lighten areas in the art and what an improvement it made in comparison to the original art shown in picture A. The color dodge mode is located in the options bar when the brush tool is selected. The options bar is at the top of the screen under the menu bar. The following steps show how to use it to lighten art.
1. Select the brush tool (Mac & Windows = B).
2. Go to the Mode pull down menu in the options bar and select Color Dodge located in the middle of the menu.
3. Duplicate the art layer (pull down menu in the layers window - at the top). You will want to be able to switch back and forth between the edited version of your art and original art. Also it is easy to over do the shading and you will want to make sure that you can start over again if needed.
4. Lock the layer at the top of the layer menu so that you will not paint outside the edges of the art. Of course, if the entire layer is filled with art you do not need to do this. Note: When using the "dodge tool," the tool does not allow you to paint outside the art so you do not need to lock the layer.
5. Select a brush tip from the brushes menu. I used a spray brush tip to highlight the morning glory art but any brush will work.
6. Reduce the opacity to 10 percent or less.
7. Select a color lighter than the art you wish to highlight. It is located in the color window (foreground) at the bottom of the tool bar.
8. Start highlighting your art while adjusting the size of the brush (increase size = ] key; decrease size = [ key), opacity, and switch to different brush colors as you highlight different colors until you get the desired look. Periodically switch back and forth between your original art layer and your edited art layer to make sure that you have not highlighted the art too much and washed out the colors.

Using the Color Burn Mode to Darken Art
Picture C shows the edited art after the color dodge and color burn mode was applied to selected areas. It does not look much different than picture B because I did not have to darken many areas in this painting. They were already dark enough.

Essentially follow the steps outlined for the color dodge mode (steps 1 through 8) to edit your art but select the color burn mode instead of the color dodge mode. The color for the brush needs to be darker than the art instead of lighter and most likely you will need to use a very low opacity (5 percent or less) when using the color burn mode.

Note: Make sure that you switch the mode back to the normal mode after you use the color dodge and color burn modes. Otherwise, the brush tool will not work properly the next time you use it for painting.

Friday, November 27, 2009

List of Non U.S. Art Licensing Agencies


The article "List of Over 50 U.S. Art Licensing Agencies" would not be complete unless I also do an article on non U.S. art licensing agencies. I could not find near as many agencies outside of the U.S. but below are the ones that I could find. If you know of others, please drop me a note at joan@joanbeiriger.com with the name and web address. Thanks.

United Kingdom
MGL

Germany

Netherlands

Tuesday, November 24, 2009

Photoshop Tip: How to Place Art Around a Circle

Unfortunately, in Photoshop you cannot automatically place a border of art around the outer edge of a circle. This tutorial demonstrates a method that takes a little work but is still fairly simple to do once you know how.
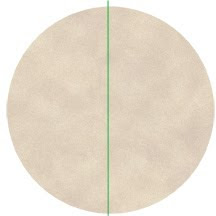
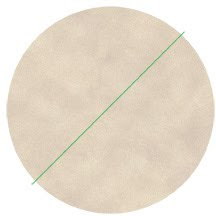
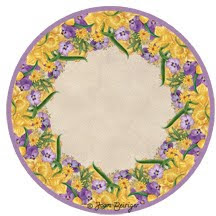


Creating a Circle
1. Create a new layer in the layers pallet (F7) by selecting the make new layer icon at the bottom of the layers window.
2. Create a circle by using the elliptical marquee tool on the tool bar (Apple and Windows = M). Hold down the shift key while you drag the tool to make it completely circular.
3. Fill the circle with a color by using the bucket tool (Apple & Windows = G) or place a background pattern on the circle and delete the excess as I did in this example.

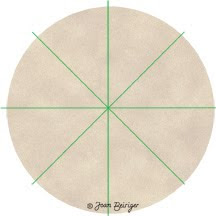
Creating Template Lines as Guides for the Placement of Art. In this example, I used four lines to divide the circle into eight spaces.
4. Create a new layer.
5. Select a foreground color on the tools pallet that is different than the circle color.
6. Select a brush (Mac & Windows = B) with a fairly fine tip (about 5) place the cursor at the center top of the window. Click once with the mouse. Place the cursor at the center bottom of the window, hold down the shift key and click the mouse. You now should have a line on top of the circle.

7. Use the transform tool (Mac - command + T; Windows = Ctrl + T) to select the line. By holding down the shift key and moving the cursor outside the bounding box you can rotate the line in 15 degree increments around the circle which equals 24 spaces. For this example, I want to rotate the line every 45 degrees (four lines) so I need to move the line three times.


8. Reset the line to the original line orientation by selecting undo in the edit menu. The reason to undo the last step is so that you can use keystrokes to automatically duplicate the lines every 45 degrees. Hold down (Mac = command + option + shift; Windows = Ctrl + alt + shift) and press the letter T to duplicate the line at 45 degrees. Continually holding down the keys and push the letter T to duplicate the next line and again press T to duplicate the last line. You should have four template lines in separate layers that divide the circle into eight spaces.

Note: You are not limited to dividing the circle into eight spaces. You can use the technique above to divide the circle into as many spaces you wish as long as they are in 15 degree increments.

Placing art around the circle
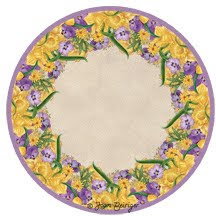
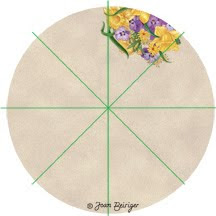
9. Open a new layer and fit the art into one area of the circle. In this case, I took my daffodil and violet art (BOU001) and resized and cut it to fit the outer curve of the circle. Notice that I placed some of the art over the template lines. I did this so that the border of art will look continuous once the art is duplicated around the circle.
10. Use the transform command to select the art.
11. Move the center mark in the bounding box (circle with lines) to the center of the circle (where the template lines intersect). By doing this, you will be able to more or less center the art around the circle when you duplicate it in the next step.
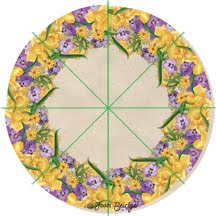
12. Duplicate the art in 45 degree increments as you did for the template lines in steps 7 and 8. You need to press the letter T six times to duplicate the art around the edge of the circle not three times like you did for the template lines. One edge of each top layer over laps the bottom layer to give it a continuos border of art.
13. Most likely the art is not correctly positioned along the edge of the circle so you will have to move the duplicated pieces into place.
14. Because the last art piece is the top layer, the right edge of the art is not tucked under the art of the first layer to make it look continuous. To correct it, duplicate the layer and move it below the first art layer.
15. Go to the top layer and erase the art that overlaps the art on the first layer. You now have a continuous border of art around the circle.
16. Remove the template lines and add a colored border if you wish.

Round formated art like this can be used as a plate, coaster, hot plate, or clock.

Friday, November 20, 2009

List of Over 50 U.S. Art Licensing Agencies

Just like there are many kinds of manufacturers, there are many kinds of art licensing agencies. Some only license art and some sell art as prints or on products besides license their artists work. Some agencies represent artists whose art fits only a niche market such as lodge, western, and country. Others specialize in representing artists whose art is suitable for home decor, or patterns for fabric, clothing, stationery, and scrapbooking. And of course there are some agencies that license all kinds of art for all kinds of products. Some agencies represent several artists and some represent several hundred artists. Some agencies will sign up artists that are new to licensing while other agencies will only accept artists that are already known and have achieved some measurable amount of licensing success. These agencies tend to represent artists that have a uniquely recognizable art style and are or can become a brand.

To learn more about art licensing agencies, read "The Truth About Art Licensing Agencies". Search the following list of art licensing agencies that are located in the U.S.  Note: There are no longer over 50 agencies listed because some that were originally listed in 2009 are no longer in existence or have been removed from the list due to complaints that their business practices are not in the best interest to the artists they represent. [List updated 5/23/17]

Note: I have not researched all the following agencies so I do NOT necessarily recommend any of them.  You need to do your own research and ask other artists for recommendations because not all agencies offer artist/agency agreements that is in the best interest of the artist. Thus, read the agreement VERY carefully OR better yet hire an attorney that specializes in art licensing to check-it-out before you sign it. The clauses in the agreement are not always clear and you may regret signing it. Hiring an attorney is worth the cost! 

For a list of non U.S. art licensing agencies read "List of Non U.S. Art Licensing Agencies."