Joan Website | Joan Bio | Joan Licensing Info | Joan Contact Info | Blog Main Page

Art Licensing by artist Joan Beiriger: I'm happy to share art licensing info but please
give me credit and link to my blog when using it on your site. Thanks.

Wednesday, March 27, 2013

Art Licensing: Marketing Art with Blogs

A major key to license art is to get your art out into the world so that clients and consumers are aware of it. And, ways to gain visibility is to actively market your art with publicity (news releases, advertisements, exhibiting at trade shows, etc.), having art on products at retail, and networking via social media such as Facebook, Linkedin, blogs, and twitter. Writing a blog is considered one of the best ways for people to get to know and connect with you. It is also a good way to market your art.

Artists are often hesitant to start a blog because they heard that you need to produce a post each day and they just do not have the time. However, blogging is still an effective marketing tool even if you do not post daily or weekly. For more information about how often you should post, read founder and editor of ProBlogger Blog Tips Darren Rowse's article "You Must Post Every Day on Your Blog (Misconceptions New Bloggers Have #2)."

Creating a Blog
Even if you want to have your own blog, you may not know what to write about. Some artists use a blog to showcase their art, and/or show their licensed art on products, and/or discuss how they get inspiration to create their art. Others use it to voice their opinion, interview people in the industry, or share information.

Blog articles do not need to be long but should contain content. Some blog experts state that a good blogger uses the 60/20/20 rule. 60% of the content of the blog should be useful information for the target audience, 20 % should be used to promote others and 20% to promote yourself. They also suggest that each article include a picture(s) to create interest. Note: This is one way an artist can market their art by using the art to illustrate the content in an article.

Enticing Readers to a Blog
Having engaging and varied subject matters entices readers to view blogs. Some bloggers may give away free things, have contests and drawings, have a blog hop (see below for an example), list resources, give tips, and show how-to-do something. Also using keywords in blog articles to optimize search engines helps drive readers to the blog. For more about search engine optimization (SEO), read "Search Engine Optimization and Blogging."

Below are some examples of blog posts that artists, agents and manufacturers have used to drive traffic to their blogs.
• Product Drawings (Sweepstakes) and Free Items
– manufacturer Clothworks "Valentine Quilt Kit Giveaway!"
– artist Phyllis Dobbs - "Free Patterns for Bee Yourself Fabrics"

• Tips: how-to & how-it-is-done
– artist Jane Maday - "Emerald Green"
– artist Jody Bergsma "Mysterious Aqua Blue and a Trip to the Sea"
– manufacturer Magnet Works, Ltd. - "DrinkBlots - Made in St. Louis, USA"

•  Interviews of artists, manufactures & retailers; Sharing art licensing resources & view points

– artist Alex Colombo (The Moon from my Attic, an Art Licensing Chronicle)
– agent Jim Marcotte (Art Licensing: Thoughts and Comments from Jim Marcotte)
– artist Kate Harper
– agent Lance Klass (TheBusinessofArtLicensing)
– agent Maria Brophy – artist Patti Gay (illustrator's Market)
– artist Tara Reed (ArtLicensingBlog)

• Blog Hop
Blog hops are a list of links that a group of bloggers post on their blogs so that readers "hop" from blog-to-blog and see the same theme on each blog. Successful blog hops have an interesting theme that is an incentive that drives traffic to each blog. A good example of a blog hop is by artist Aaron Christensen and 11 other artists that showcased their studios in 2012 "Hi Resolution - A New Year's Studio Meet and Greet."

Creating Successful Blogs
A simple rule that I have often heard about creating successful blogs is to post a picture, post often and post short (length of article). But just like many things in the art licensing industry it depends upon the usage and circumstances. Not all posts need a picture but for art blogs it sure is a good opportunity to market art. And, posting often and short can mean different things to each person. Thus, it is up to the blogger to make the decision how often she/he should post and how long the articles should be.

Read "How to Be a Successful Art Blogger: 7 Effective Blogging Strategies for Artists" by Dan of emptyeasel.com.  In his discussion about successful art blogs, he states that:
1. Create an art blog that is NOT a 'personal" blog,
2. Treat your blogging time as a business time
3. Be a content creator, not a content recycler.
4. Keep a schedule of upcoming topics to write about,
5. Don't just write about yourself and your artwork,
6. Point to good resources whenever you find them,
7. Re-read and edit each post before you publish it.

Blog Software
Two of the most popular free blog software is WordPress and Blogger. To find out about them and others, read "2013 Best Blog Software Comparisons and Reviews."
http://blog-software-review.toptenreviews.com/

Your comments are welcome. Please click on the comments section (below) to write your comment.

Monday, March 11, 2013

Art Licensing: How to Transfer Multiple & Large Hi-Res Files

Often it is not an option to send electronic images to clients on CDs or DVDs via snail-mail (postal delivery) because in the art licensing industry manufacturers need high-resolution (HiRes) files as soon as possible to meet their deadlines. And, if there are many files to send and the files are large, there may be a problem sending them via electronic mail (e-mail) because the recipient's e-mail carrier often limits each e-mail to 25MB or less. Most of the Hi-Res files requested by my clients are 3MB to 9MB. If three or more images are requested, they usually cannot be sent in one e-mail because it will most likely be rejected by the e-mail carrier. And, if a large Hi-Res layered Adobe Photoshop image needs to be sent it may be at least 250MB in size that is impossible to transfer via e-mail. Some manufacturers have ftp (file transfer protocol) sites where an artist can enter a password and upload large files. However, most do not.

So how can artists transfer multiple and large HiRes files to manufactures? This is where internet file sharing host services make it possible such as dropbox, Goggle Drive, YouSendIt, MediaFire, RapidShare, ShareFile, etc. Most of them are free with limited options. Additional options are available at a cost.

One of the most popular file sharing service used by artists is YouSendIt.com. The free version allows a person to store up to 5GB of files on the YouSendIt site with a maximum of 100MB per file size. The files can be customized for the length of time they are stored on the site. YouSendIt also tracks when files are download and by whom which makes it convenient in tracking that the client received the file(s). The downside to the free version is that only a link to one file at a time can be sent to a recipient via a YouSendIt e-mail. But, for $9.99 per month, a person can store up to 25GB and send links to multiple files with a maximum of 1GB file size. Note: I purchased the service so that I could send links of multiple large Hi-Res files to all my clients (manufactuers, publication editors, agent) with one e-mail. With the limitation of the free version, I found it VERY cumbersome and unprofessional to send multiple e-mails when clients requested numerous images! All my clients find YouSendIt sent links straightforward and easy to download files. I usually limit the storage time of each file on the site to about ten days for security reasons. That way, not many images are available if the site is hacked (unauthorized access was gained to the site).

To find out about other file sharing services, read "10 file-sharing options: Dropbox, Goggle Drive and more" by Serdar Yepulalp on the Computer World website. He described and listed the options of MediaFire, RapidShare, ShareFire, YouSendIt, Box, Dropbox, Google Drive, Minus, SkyDrive, and SugarSync.

Please share your experience with any file sharing services. Click on the comments section (below) to write your comment.

Monday, February 25, 2013

Photoshop Tip: Creating an Animated .gif File Slideshow

A good way to capture attention is to place a short slideshow of your best work on your website, blog, iPad, smart phone or even e-mails. A slide show is eye-catching and a good marketing tool as long as it is short and used strategically (i.e. not used too often on a site or placed where it distracts from the main objective). Customized slide shows can be created for you by service companies such as myesig.com or you can create your own with Adobe Photoshop by using the animation tool and saving it as a .gif file. The advantages in having a company created slide show is that their services include faster download of the slideshow, linked buttons and button statistics.

Note: A draw back to animated gif file slideshows is that not all operating systems support it. For instance, an animated gif file slide show on a Mac with OS snow leopard does not work in MacMail (email browser) and neither does Windows OS 7 in the Windows Picture viewer on a PC. Only the first frame of the slideshow is displayed. Thus, it is best to start the slideshow with the image you want everyone to see just in case the viewer cannot see the rest of the images.

A file with many layers (images) can be large and take a long time to download. So a slideshow should not have too many images. Also, you should save the files as low resolution (72 dpi) and in a small dimension. But, the size of the images depends on what device you are using it on. For instance, for a website the size of each image probably should be at least 3 or 4 inches at 72 dpi so that it can make an impact but for an email 1 to 2 inches may be sufficient because a smaller file for a faster download time is very important.

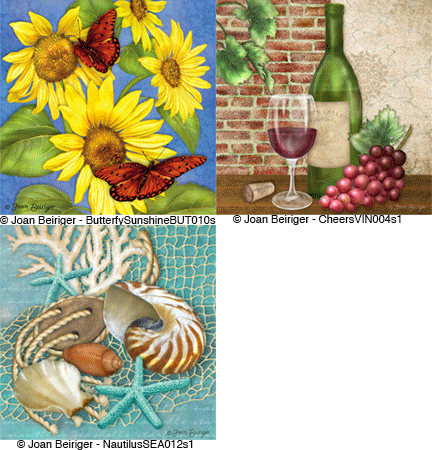
The following is the Photoshop steps used to create the animated .gif file slideshow shown at the top of this article. I used square images but any dimension can be used.


A. Format the images
Three square images were chosen for my slideshow. Since this is for a blog, I decided to format them for a 3 by 3 inch images at a low resolution of 72 dpi.
1. Open a new Photoshop 3 by 3.125 inch file at 72 dpi. The extra 0.125 inch will be used to insert copyright and identification text at the bottom of each image.
2. Drag each of the three image files into the Photoshop file. The size of the original image does not matter because it will be resized to fit the file size IF in Photoshop general preferences the "Resize Image During Place" box has been selected.
3. There are now four layers; background, and three art images. Delete the background layer.
4. Move the first image to the top.
5. Use the bucket tool to fill the space at the bottom of the image with white.
6. Type the image identification information and copyright on the white rectangle. I used Helvetica 11 pt font.
7. Merge the text onto the image layer (Command E).
8. Repeat steps 4 - 7 for each of the other images. There are now three image layers.

B. Animate the slideshow
1. Go to Window/Timeline (in Photoshop CS6 version) to open the Timeline menu. Or if you have an earlier version of Photoshop go to Window/Animation.
2. Click on "Create Frame Animation" button in the Timeline window. One image is now shown in the window.
3. In the upper right corner button of the Timeline window, select "Make Frames from Layers." All three images are now shown. The position of the images displayed can be adjusted by dragging the images.
4. The animation can loop forever or the number of times you wish. Select the Once button at the bottom of the timeline window to select what you want. I chose forever for my slideshow.
5. Set the length of time each image is shown, by clicking the drop down sec button below each image. All images will be set to the same time if you select each image in the Timeline window by holding down the shift key and then selecting the time. I used 2 seconds per image for my slideshow.
6. Test out the slideshow by clicking on the right arrow at the bottom of the Timeline window.

C. Save the slideshow
1. Save the file by selecting File/Save for Web.
2. Select GIF and press Save.
3. Name the file and press Save. The size of my animated gif. slideshow is 106 KB.

Your comments are welcome. Please click on the comments section (below) to write your comment.
Tuesday, February 12, 2013

Art Licensing Editorial: Why, Where & How to Network

If you have read articles about licensing art, you probably heard that networking is an excellent way to gain visibility. That is because art licensing is a business of relationships as are most businesses'. As you build your relationships with artists, agents, consultants, manufacturer owners and art/licensing directors, retailers, etc., you are promoting yourself and your art, learning important information about art licensing by asking questions, and make connections that may lead to referrals and possible future opportunities. Read the following to find out where and how to network in the art licensing industry.

Where to Network
Social networking via the Internet
– Facebook
For information about Facebook, read "How To: Use Facebook for Professional Networking"

– Google Plus
Learn about Google Plus by reading "How to Use Google Plus for Professional Networking [10 Smart Ways]"

– Linkedin groups
Once you belong to Linkedin and create your profile, you can join some of the art licensing groups such as Art of Licensing, Greeting Card, Stationery & Gift Industry Gurus, Licensing Commercial Art, and International Licensing Industry Mercandisers' Association (LIMA). For ways to use Linkedin read, "Linkedin 101 | How to Effectively use Linkedin as a Networking Hub"

• Trade and Licensing Shows
Either walking or exhibiting at trade shows are excellent ways to meet manufacturer art/licensing directors face-to-face. Artists that work with art directors say that meeting in person to discuss design ideas and plan future projects are much easier and more satisfying than via email or by phone.

– Attend wholesale trade shows such as the Atlanta Gift Show that is held twice a year. For information about trade shows, read "Art Licensing: Why Walk Wholesale Trade Shows?"

– Attend or exhibit at art licensing shows such as Surtex in New York each May and Licensing Expo in Las Vegas each June.

• Retail stores
Questioning small gift shop owners and managers is a good place to find information about what type of art sells best on product and why the retailer carries certain manufacturer products. Especially during the off season or the quiet part of the day, many store owners and managers are more than willing to discuss products and the artist's work they carry. I have also learned a lot from retailers about manufacturer reps, product delivery, product quality, and minimum product requirements. All this information is useful when creating designs and choosing what manufacturer to approach for licensing consideration.

• Licensing show seminars
Introducing yourself to attendees and exchanging business cards while waiting for a seminar to start and approaching the seminar presenters after the seminar is another way to start a relationship. It can be followed-up with a short email to continue the relationship.

• Receptions
Local art show receptions and receptions at wholesale trade shows that are often sponsored by manufacturers are other networking opportunities.

• Art associations
Search the internet, local art schools, colleges or adult education that offers art classes or the chamber of commerce to see if there are any local art and design associations or groups where you can network and share information.

• Local Art Licensing support groups

Support groups are excellent ways to network and share information. There are at least three art licensing support groups in the U.S.; in the Denver Colorado area, in the San Francisco California area and in the Kingston New Hampshire area. To find out how to form your own support group read "Start an Art Licensing Support Group" by Kate Harper.

But for many artists it is VERY difficult to network. If artists are shy or introverts or both, phoning, emailing, and meeting strangers are too uncomfortable. In researching for this article, I found out that being shy is different from being an introvert. Shy people are afraid of rejection, sounding stupid, think they have nothing important to say, and have no idea what to say to strangers. A shy person does not necessarily want to be alone but is afraid to interact with people they do not know. However, an introvert prefers time alone and gets emotionally drained after spending a lot of time with others. According to statistics there are about 25% introverts and 50% shy Americans.

How to Network
There are ways to overcome shyness and the most important is to be prepared with elevator speeches (short 30 second introductory remarks) about yourself and your art and be willing to ask questions. For more information to combat shyness, read the following articles in no particular order.

• "The Networking Disconnect" (Why you should network.)
• "How to Network: 12 Tips for Shy People"
• "How to Create People Networking Skills"
• "5 Networking Tips For People Who Hate Networking"
• "24 networking tips that actually work"

Using Elevator Speeches
Below are articles on how to create and use elevator speeches and some examples. Note: If you are exhibiting at Surtex or Licensing Expo, make sure you read Tara Reed's article "Elevator Speech" ready for the SURTEX 2013 show?"

• "How to Craft Your Elevator Speech - for Artists"
• "The Elevator Speech" (with examples)
• "Elevator Speech Do's and Don'ts"
• "Sample Elevator Speeches" (examples that are interesting, not boring, but maybe a little over the top)
• "Writing an Elevator Speech for Photographers" (example on attempts and final version).
• "Do you have an "Elevator Speech" ready for the SURTEX 2013 show?" by Tara Reed (with examples)

So if you want to gain visibility of your art and learn more about art licensing, step outside your comfort zone and start networking! I am a shy person but no one is aware of it when they meet me because over the years I have learned to put on my social hat when I go out in public. I use to dread making cold-calls or meeting manufacturers at trade shows until I found out about memorizing elevator speeches. Being prepared on what to say made all the difference. Now I actually look forward to meeting people that I do not know. And I found that I can even handle rejections and brush-offs that occur occasionally. After all, it is just part of the business that I am passionate about :)

Your comments are welcome. Please click on the comments section (below) to write your comment.